Posts

Showing posts from July, 2015

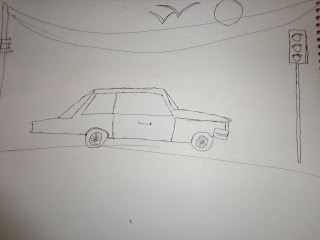
Sketch: a car

Image
My cousin requested me to do a drawing of a car for her to color in. I drew this car by copying from one of those little dinkies my brother has.

The Stool I made long ago

Image
This is a stool that I made long ago, when I was almost 10 years old, at a Wood Work course that we attended at  L2L Academy  where we learnt to make furniture (stools, chairs and tables,etc.) without nails and glue. This demanded quite a lot of hard work and took more than 24 hours to make. I used to love my Stool but then it was very weak so it was retired to a corner of the house and we never used it.  A few weeks ago, I decided to show it to my little cousin and took it out. Upon assembling it, I realized what useful it was. I decided to knock in some nails and glue it together and find some use of it. It took barely an hour to renew it. I made a polish of my own by mixing water, German glue and silver and copper colored dust together and painted it over. It looks great, and is useful too. I'm glad I decided to do it!
How to make Loom Bracelets!

Image
Making Loom Band Bracelets is an easy and fun art. Although some kids buy whole kits containing DIY Loom Bands and tools to make them, making Loom Bands is simple and requires only your fingers and colored rubber bands. This is a guide to making basic loom bands, with your fingers. 1. Decide on a color scheme and pick out some loom bands. I chose a 'Random' color scheme 2. Take a rubber band and put it in one finger. Twist it and put in the other finger. Like this 3. Put in two rubber bands, without twisting them. See? 3.Once you have 3 Rubber bands, pop the last one in the middle of your two fingers. Cute, isn't it? 4. Keep repeating steps 1-3. You will start to form a braid of rubber bands. When it is about 3 and a half inches long... Like this. 5. ...Pop one all the rubber bands in both your fingers in one finger. Attach a clasp or thread both ends together to form a ring or a bracelet. Your ring, ready! 6. Your loom band i